
Part 1. Left Hand
Perhaps the oldest cliche in golf instruction is that a sound grip is the foundation of a sound swing. Every golf book ever written contains a chapter about the grip. With every detail of the grip lavishly illustrated. Unfortunately, the function of the grip in the swing is less frequently discussed. If it were, players would have a better understanding of the importance of an “orthodox” grip, and how to achieve it.
As the details of the orthodox grip are so well known, how is it that so few golfers actually possess such a grip? The tragic fact is that the orthodox golf grip simply will not work for most players… they have too many errors in their swing actions to live with it! Most of them spend years searching for a grip… any grip… that will minimise the errors in their swings. Hence the endless variety of grotesque grips one sees on the course.
Go to any golf range. Most of the victims can be seen fiddling with their grips, experimenting endlessly in the hope that natural selection will provide them with a position that will reduce, or eliminate the slice. They should, of course, be rebuilding their swings, not their grips!
So get your grip right, and stick to it. If you can’t play golf with an orthodox grip, it’s your swing that needs attention… not your grip. You can’t cure a bad swing with an equally bad grip.
It is not generally appreciated that the set-up and grip are closely inter- related. A poor set-up makes a good grip more difficult, and a bad grip affects the set-up. This is important. So relate what is said about the grip to what I say elsewhere about the set-up, particularly of the arms. They are the two sides of the same coin.
Like every other aspect of the swing, common sense principles govern the “orthodox” golf grip. You should be aware of them.
First, what is the role of the grip, in the swing? In all “bat and ball” sports we aim to get the striking surface of the “bat” (or racquet, club, etc.) moving squarely along the intended line of flight of the ball. If the face of the striking implement is not moving squarely along the intended line of flight, sidespin is imparted to the ball, and it does not fly straight.
A correct grip simply enables one to swing the club backwards (to the top), and return it to the ball (in the downswing) so that the club-face is both square to the intended line of flight (as it was at address), and travelling along the intended line of flight at impact, and slightly beyond.
A so called “good grip” will, barring other complications in the swing, bring about these two requirements. “Bad grips” make the attainment of these two conditions almost impossible.
General Principles, Left hand Grip
1. With the club correctly soled in front of you, align the open left palm to the shaft so that the back of the left hand squarely faces the target.
2. Close the left hand on the shaft. The thumb will be on top of the shaft at this stage, vertically aligned with the centre of the shaft.
3. We now turn the entire left hand slightly to the right as illustrated, so that the left thumb moves to the right side of the shaft… just a little. We have turned the left hand in this way simply to establish muscular contact between the fingers and wrist of the hand… and the left forearm. That is all. This adjustment “firms up” the entire hand and wrist. You can feel this quite distinctly. The left hand and arm can now act as a single unit, swinging the club with control. The thumb on top of the shaft (position 2) is a “weak” position of the hand in which the wrist has too much freedom to hinge. This makes control of the club-face much more difficult.

Angle of the shaft

With the club correctly soled in front of you, apply the open left hand to the shaft. Note carefully the angle of the shaft across the base of the fingers. This is critical. It runs from the middle knuckle of the forefinger to a point just below the base of the little finger.
Spacing of fingers
Close the hand on the shaft. Note that the last three fingers are close together. The forefinger makes a slight gap with the next finger to help support the thumb.
The thumb opposes the fore-finger, and is slightly off-centre, on the right of the shaft. NEVER ON TOP OF THE SHAFT, remember!
The position of the left thumb, key to power and control…
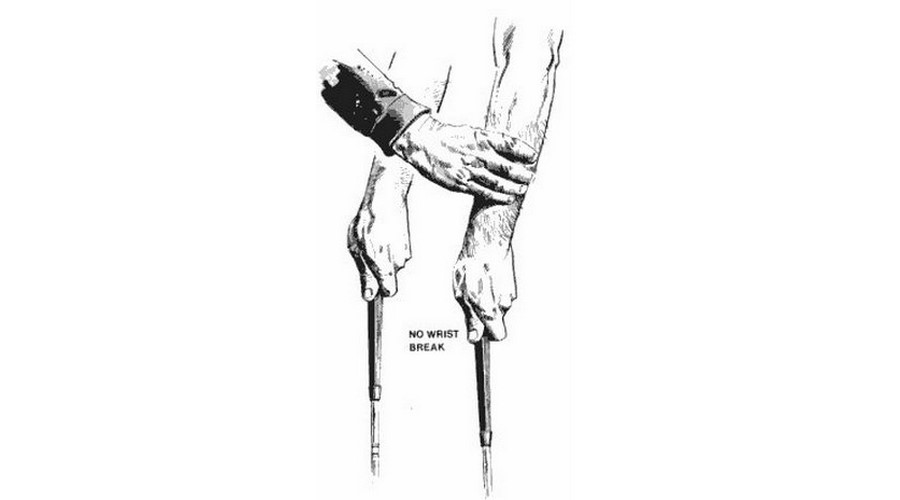
1. Correct
The position of the left thumb on the shaft is critical. I have said that it should favour the right side of the shaft (picture 1), and is placed in this position by rotating the hand as described earlier.
The purpose of this adjustment was to establish muscular unity between the fingers, wrist and forearm, welding all together into a firm, controllable unit. The left arm hand can now swing through the ball with firmness and authority, holding the face of the club square through the ball.
To test this for yourself, place the left hand correctly on the shaft as described, and grasp the left forearm with the right hand. Note that when the arm and hand is correctly placed on the shaft the possibility of independent wrist movement (breaking or rolling of the wrist through the ball) is eliminated. The hand and arm is firm, and will remain so through the stroke.
Further, by placing the left hand (and especially the thumb) correctly on the shaft, one establishes the correct left arm position (see the “arm-set”) that we require in the set-up.
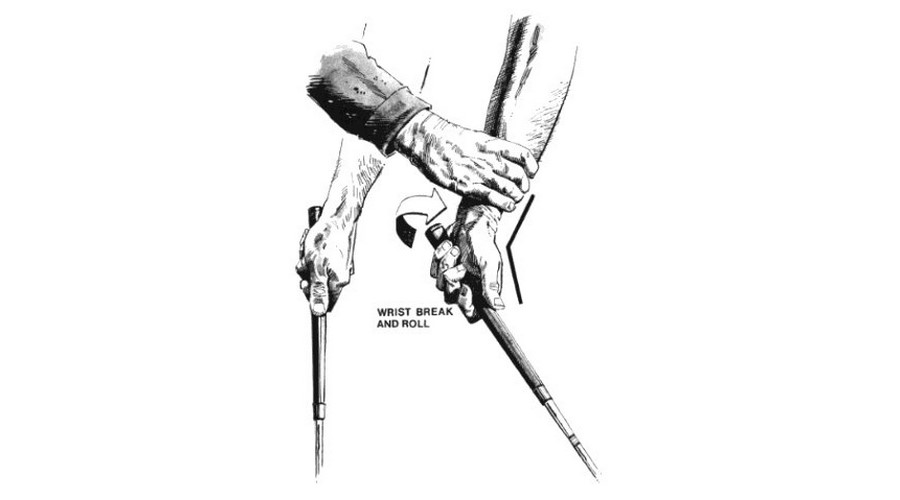
2. Wrong
In contrast, note what happens when the left thumb is on top of the shaft. Again, grasp the left forearm with the right hand. Note that the left wrist is capable of both break and roll movements when the left hand is incorrectly placed in the grip. This “looseness” is bound to occur through impact, leading to wayward shots.
That is why the placement of the left thumb is so important. It establishes a position of the left hand and arm which is powerful, leading to enhanced control of the club-face through the ball.
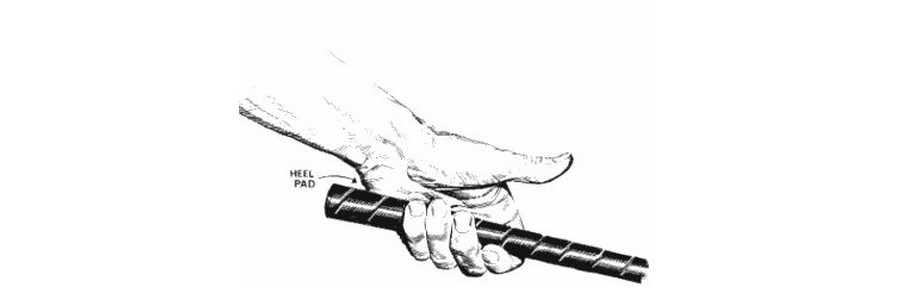
Firmness Test
Having completed the left hand grip, raise the head of the club with the left thumb OFF the shaft. If the grip is correct, the fingers will be holding the shaft secure against the fleshy pad at the heel of the hand.
The left hand is the key to club-face control in the swing. Be sure it is correctly applied to the shaft.
Part 2. Right Hand
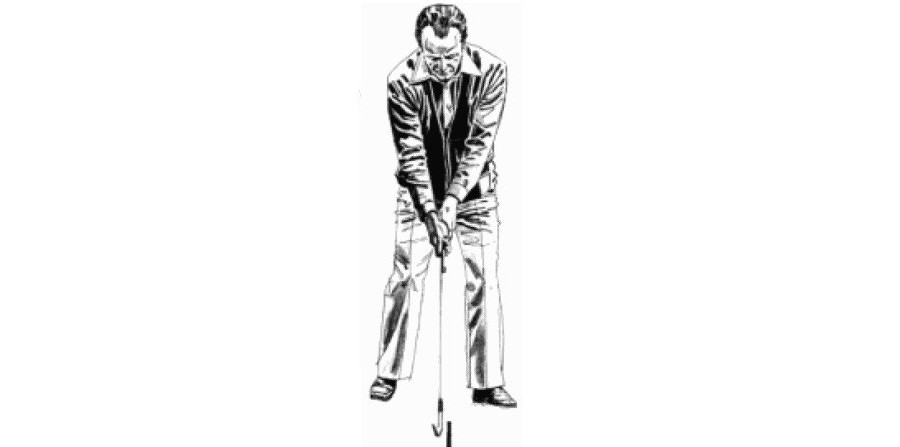
As a general guide to the placement of the right hand on the grip, consider how you would place the right hand if you were going to strike something with the palm of that hand. Quite simply, you would strike the object with the palm vertical, thumb upper-most, as illustrated.
Grips in which the right hand is either on top of, or under the shaft have no logical basis whatsoever! Thus, the right hand is placed on the shaft so that the palm squarely faces the target. this is the sole guiding principle for the placement of the right hand in the grip.
The right palm and the blade are aligned
Both squarely face the target
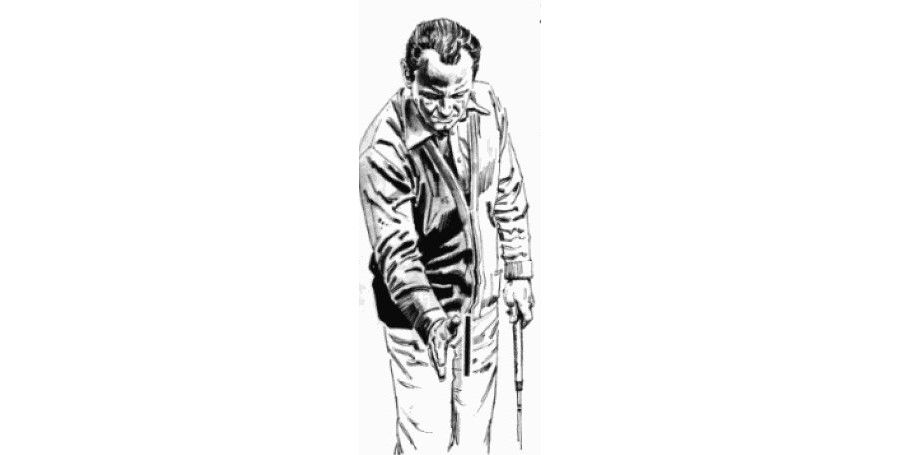
By placing the right hand in the grip with the palm facing the target, we immediately establish the idea that the right palm and the face of the club are aligned at all times.

This is a useful concept to bear in mind as, we now know that the position of the right hand anywhere in the swing sequence will be reflected by the angle and position of the blade.
In the correct grip, the right palm squarely faces the target.
Unifying the hands to complete the grip…
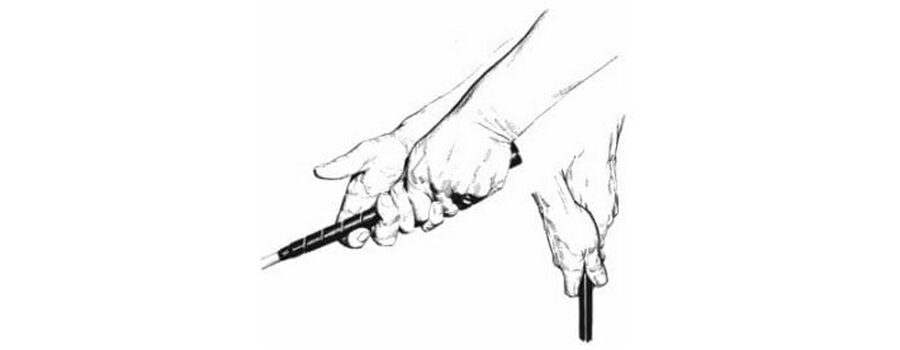
Place the open palm of the right hand alongside the shaft. The palm is thus aligned with the face of the club… that is, they are both “looking” directly at the target. That is how they must stay. Close the two middle fingers round the shaft, with the upper of these two fingers drawn closely against the forefinger of the left hand. Now loop the right little-finger over the left forefinger, so that it rests in the space between the first two fingers of the left hand. This placement of the fingers establishes a close unity of the two hands, and is known as the Vardon overlapping grip. It has been employed by most of the world’s great players, and has stood the test of time. I thoroughly recommend it to you.
NOTE
The right thumb should lie diagonally across the shaft.
Now to the right thumb and forefinger. The bent right forefinger fits snugly under the shaft, slightly separated from the other fingers. The placing of the right thumb is vital. It is never pressed on the top of the shaft, or still worse, on the right side of the shaft. It should lie diagonally across the shaft with its tip close to, or touching the tip of the right forefinger.
The grip, especially of the right hand, is mainly in the fingers. No ham-fisted palm grips please!
Get your grip right… and keep it that way!
Pressure points of the GRIP
The pressure points of the grip are with the last three fingers of the left hand, and the two middle fingers of the right hand. In other words, there is absolutely no pressure between the thumbs and index fingers of either hand. If there is, the wrists and forearms are stiffened, and the swing becomes inhibited.
Remember, we grip the club to swing it. We cannot swing anything effectively with a fierce grip. Golf is not a game of force, so don’t grip the club as if it were an axe. A sensitive, yet firm finger grip is what is required. No more… no less.

Grip pressure points. Last three fingers of the left hand. Middle two fingers of the right hand. No great pressure between the thumb and index finger of either hand.

Finally, I repeat again. Acquire a correct grip… and stick to it, no matter what. If your grip is correct, and your shots are still going off line you must look to your swing to discover the error. You simply cannot cure a bad swing by making remedial alterations to a correct grip. In doing so you are simply compounding error! Get your grip right, and then leave it alone.

Next Lesson The Role of the Golf Swing
